Email Reports
Last updated: July 14, 2026
Emailed reports allow you to receive automated reports for your analytics and review analysis data. This allows you to take a hands-on approach to keeping an eye on your data.
Creating Email Reports
To create an email report:
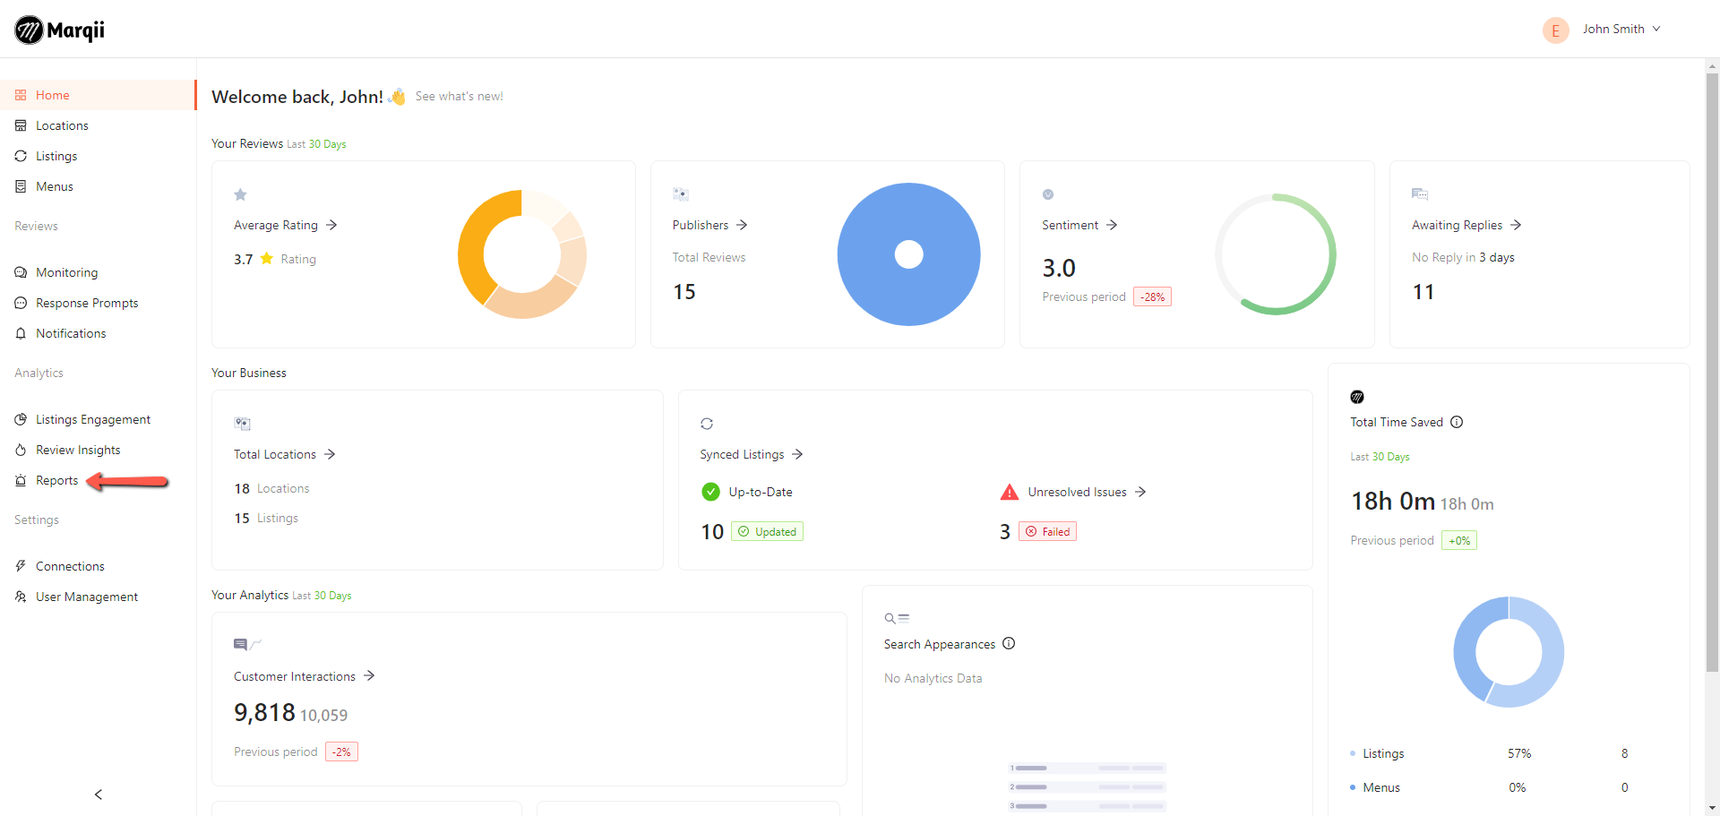
Navigate to the Reports page

In the Reports page, click on Add Report

This will bring you to the Create Email Reports page, from here you can set the criteria for your email report.
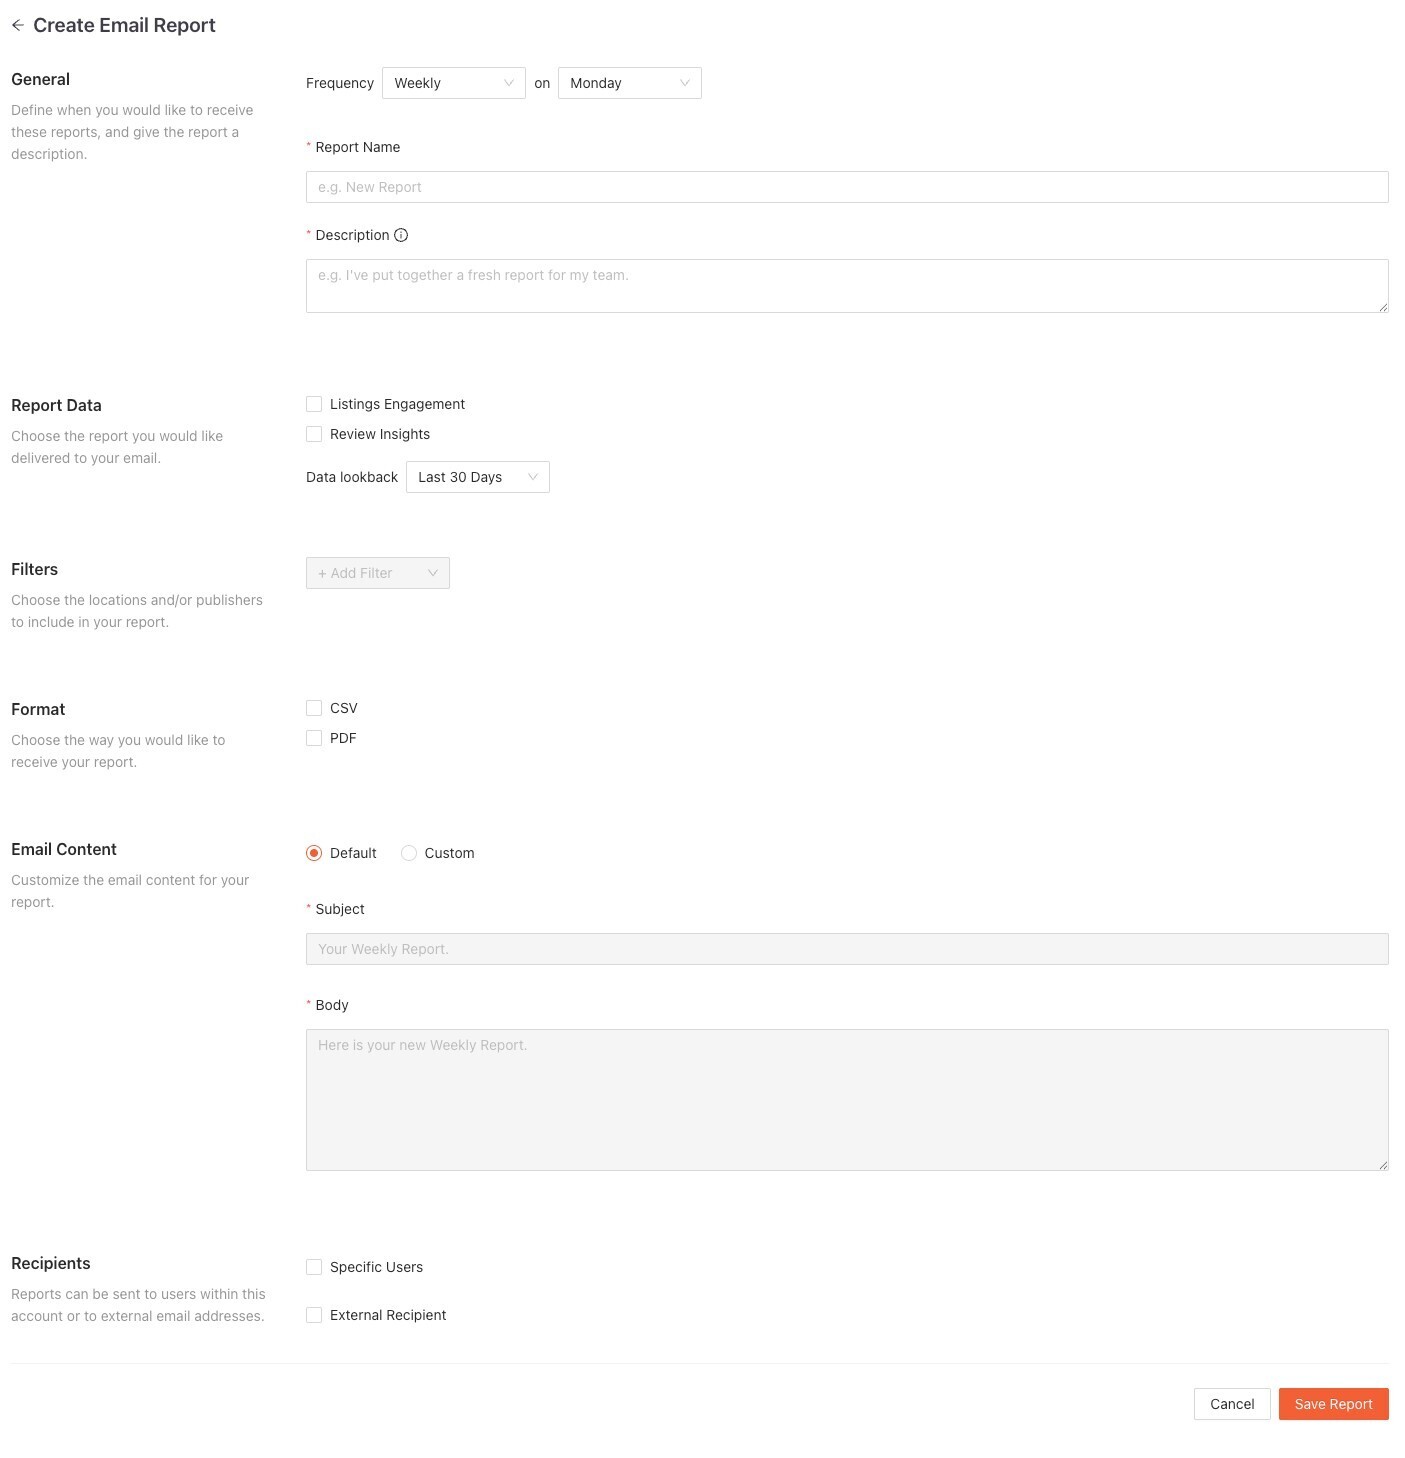
General Settings
In these settings you are able to set the name and description for your report as well as the frequency for how often you would like to receive your report.
Frequency - this will be how often you will receive your email report.
Daily - receive your email report daily.
Weekly - receive your email report once a week on a specific day (Monday - Sunday).
Monthly - receive your email report once a month on a specific day (1st-31st).
Report Name - this is the name of your email report.
Description - this is a description of the report. It will be used to help you remember what this report is for.
Note: The Report Name and Description fields are required to save your email report.
Report Data
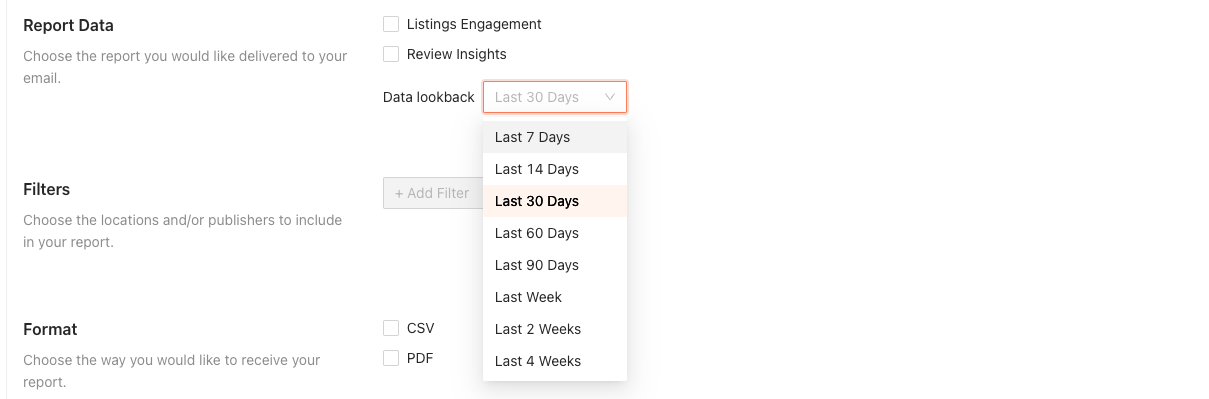
Within the criteria for your email report you can choose which reports you would like to include:
Analytics - report focused on the analytics data for your listings. This information can be found in the Analytics page.
Review Insights - report focused on review data. This includes the Review Analysis, Sentiment Analysis, and Keyword Analysis pages.
You can select a lookback window for your report, with options ranging from the last 7 days to the last 3 months. Depending on your selection, data will be grouped by day, week, or month relative to the date the report is generated.
Filters
Within the criteria for your email report you are able to set multiple filters. This will allow you to set up reports based on specific locations and publishers, for example: Google and Yelp data for your downtown locations.
Folders - choose to include or not include folders from your report.
Locations - choose to include or not include locations from your report.
Publishers - choose to include or not include publishers in your report.
You can add filters by clicking on the "+ Add Filter" dropdown button.
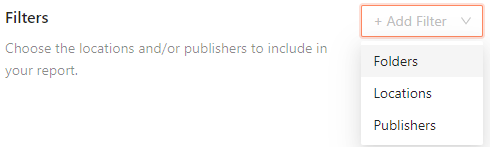
You can remove filters by clicking the trash can icon next to them.

Note: To save your email report, the Locations, Folders, and Publishers filter fields must not be empty.
Format
You can choose the way you would like to receive your report:
CSV
PDF
Note: You must have an option selected to save your email report. Both options can be selected.
Email Content
Within the settings for your email report, you are able to customize the Subject and the Body of the emails for your email report, or choose the default Subject and Body.
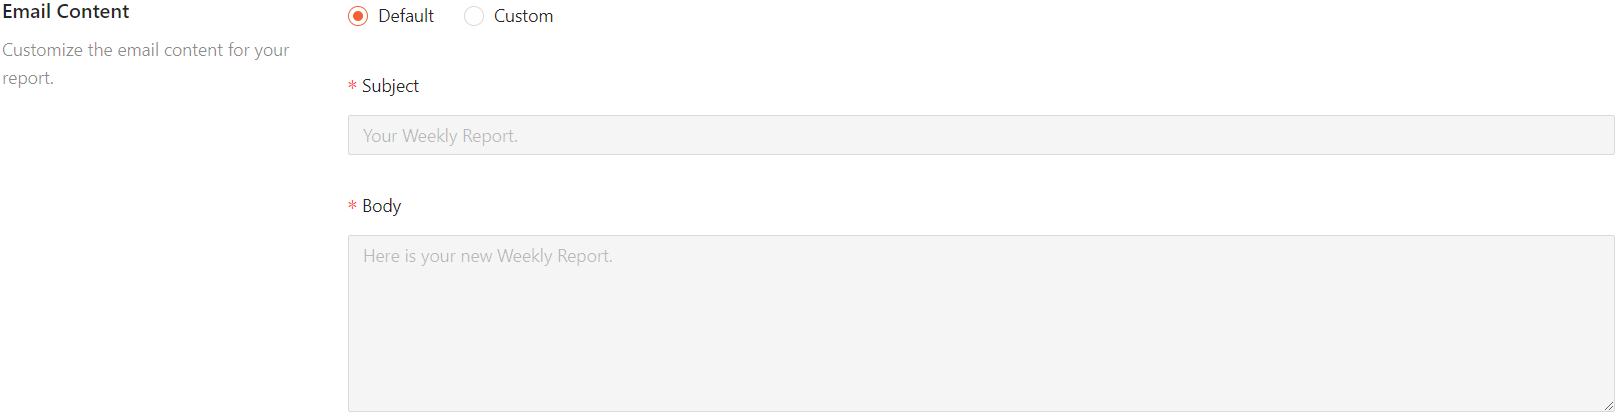
Note: The Subject and Body fields must be filled in order to save your email report.
Recipients
In the recipients section you are able to add:

Specific Users - Recipients who have a user profile in your Marqii account. These users will receive emailed reports that include a links to view the relevant pages in your dashboard.
External Recipients - Recipients who do not have a user profile in your Marqii account. These recipients will not receive links to view the relevant pages in your dashboard.
Note: The Specific Users and/or External Recipients fields must be filled in order to save your email report.
Email Report
The email report email will arrive from "notifications@marqii.com" with the subject line based on what was input in the "Subject" field for the report.
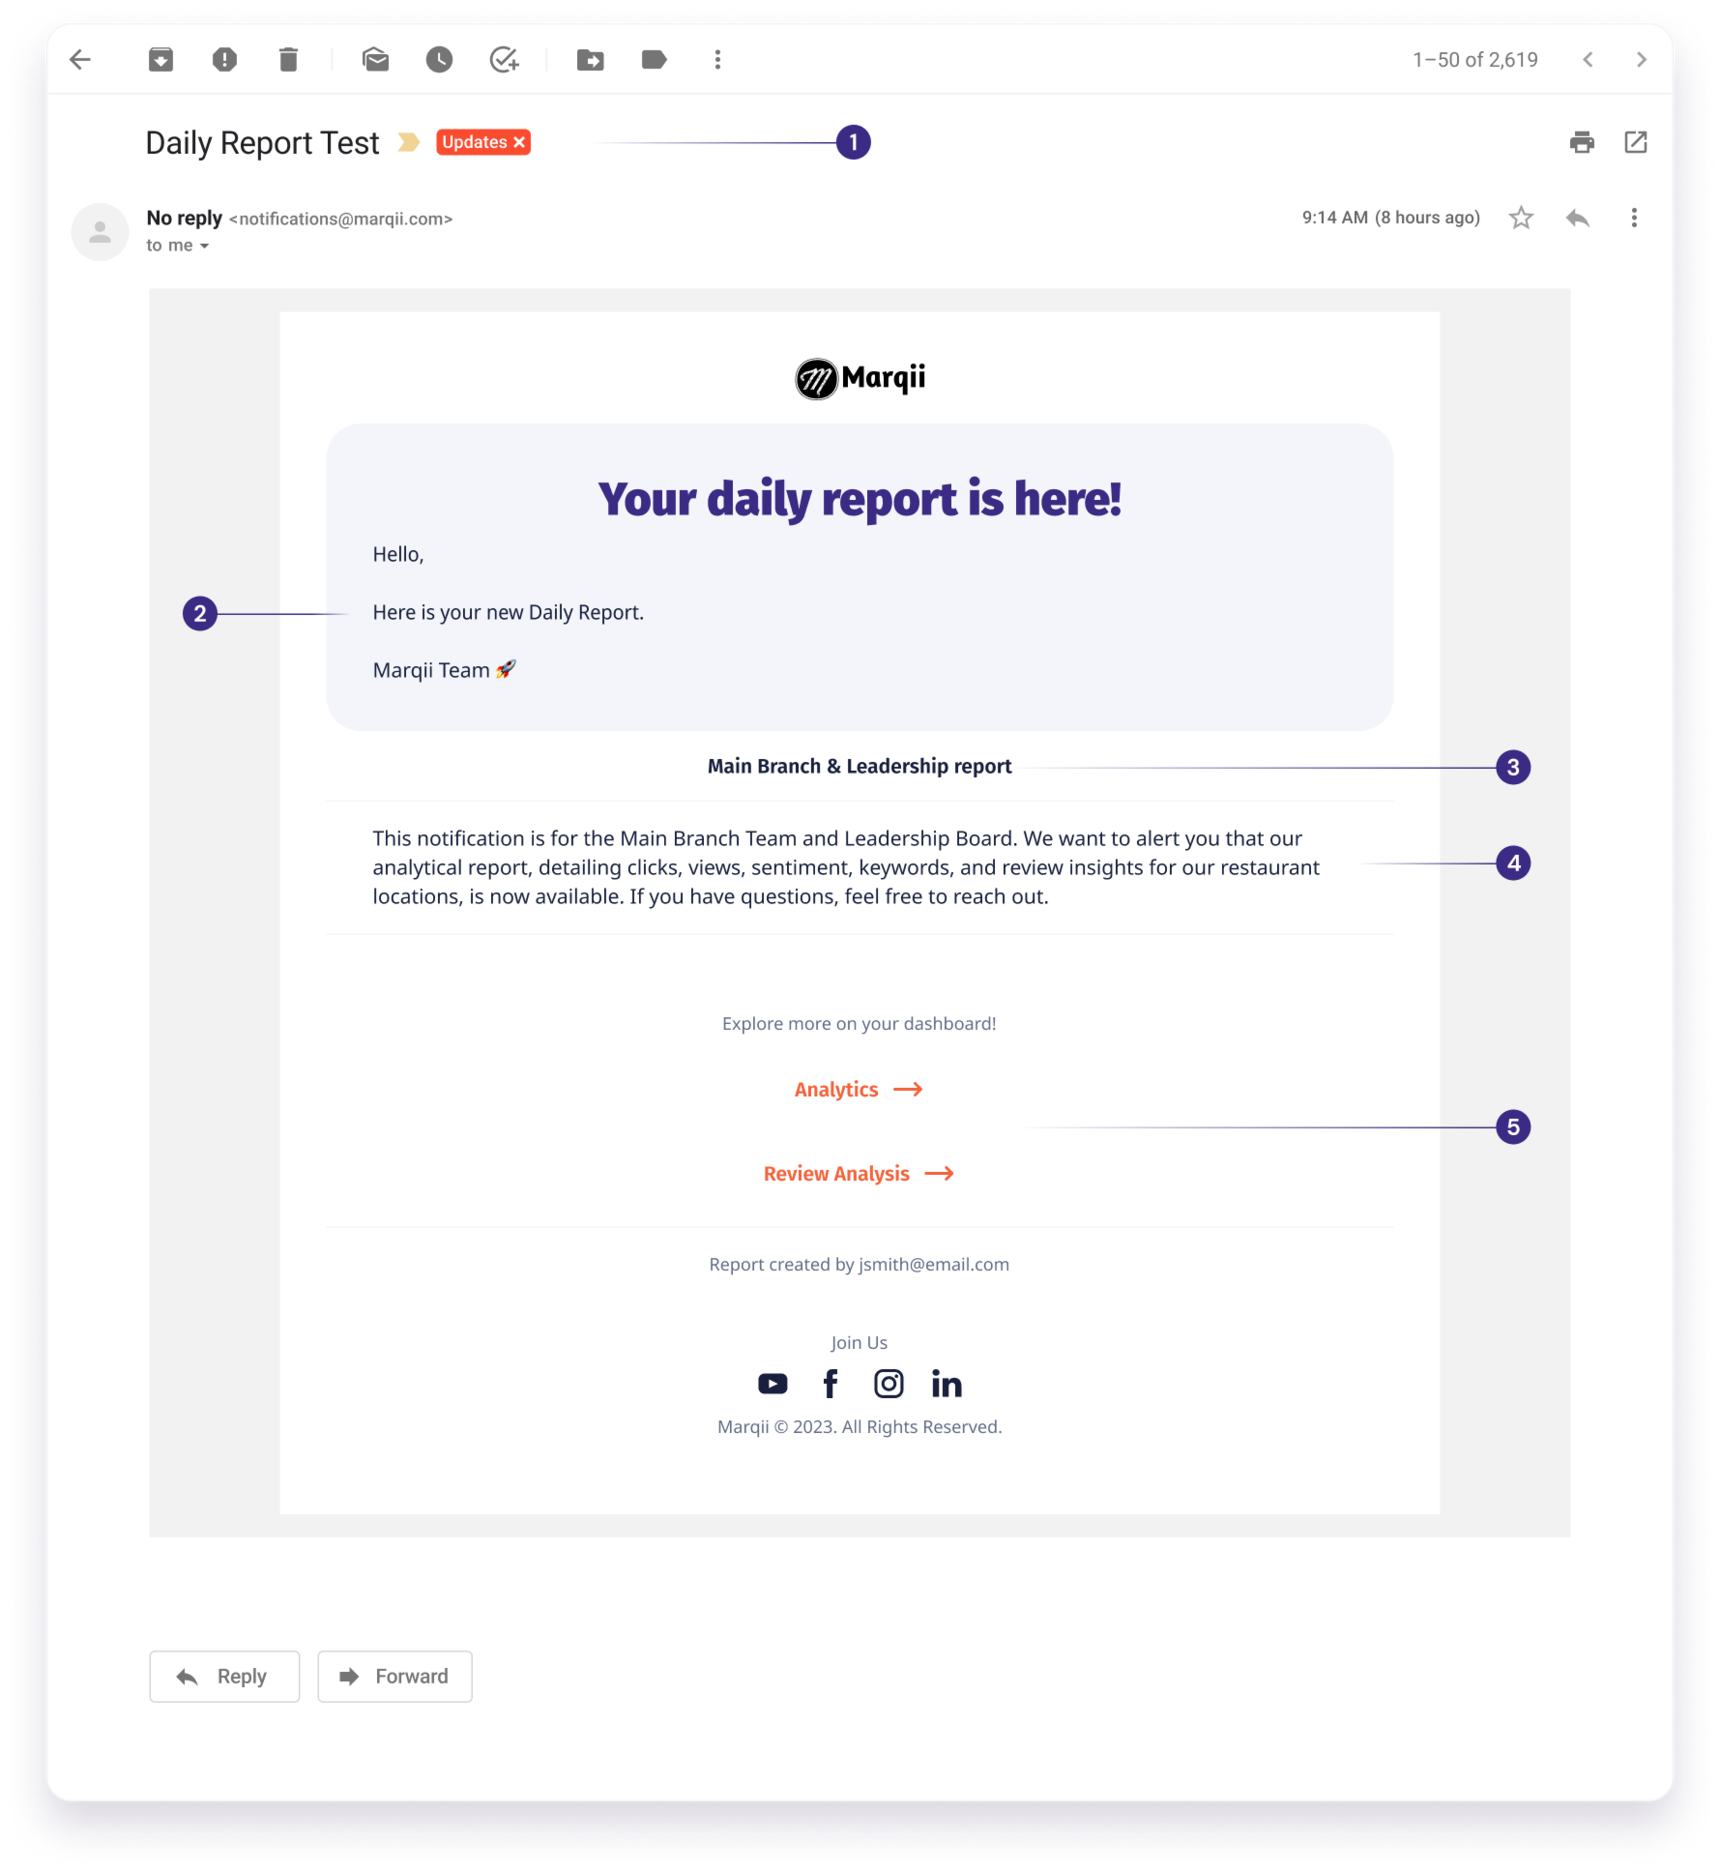
The email will display the following:
1 - The subject that was input into the "Subject" field.
2 - The body text that was input in the "Body" field for your report.
3 - The report name that was input in the "Report Name" field for your report.
4 - The description that was input in the "Description" field for your report.
5 - Links to view the relevant pages based on your reports, within your Marqii dashboard if the recipient is a user in your Marqii account. External Recipients will not receive this button.
Attached downloadable .CSV files and/or .PDF files for each of reports.
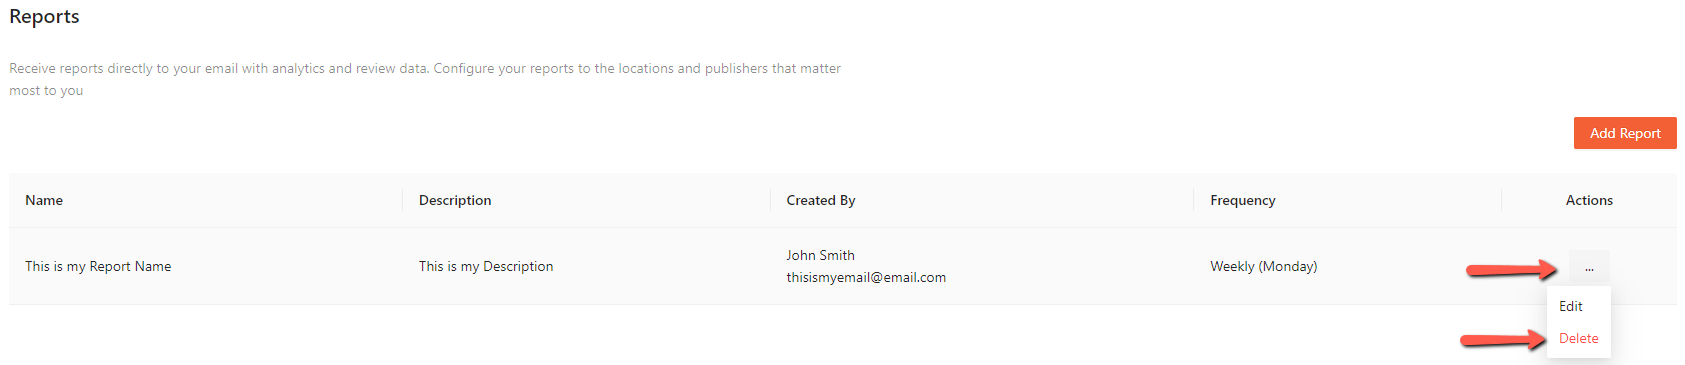
Editing
To edit an email report:
Navigate to the Reports page.
In the Reports page, click on the ellipses (...) in the Actions column and click on Edit

This will take you to the settings for the email report, where you are able to make changes.
Clicking the Save Report button will save the new changes and bring you back to the account settings page.
Clicking the Cancel button will cancel any changes that were made and bring you back to the account settings page.
Deleting an Email Report
To delete an email report:
Navigate to the Reports page.

In the Reports page, click on the ellipses (...) in the Actions column and click on Delete
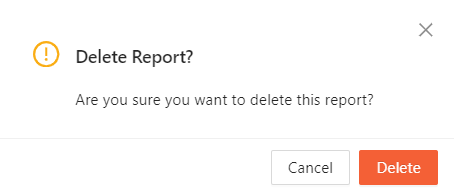
You will see a confirmation pop up, click Delete to delete your email report or Cancel to cancel the deletion process.
If you need any further assistance, feel free to contact support at support@marqii.com or text (512) 967-3739.