Managing Users in Your Marqii Account
Last updated: July 14, 2026
Creating Users
To create a user in your Marqii account:
Navigate to the User Management page
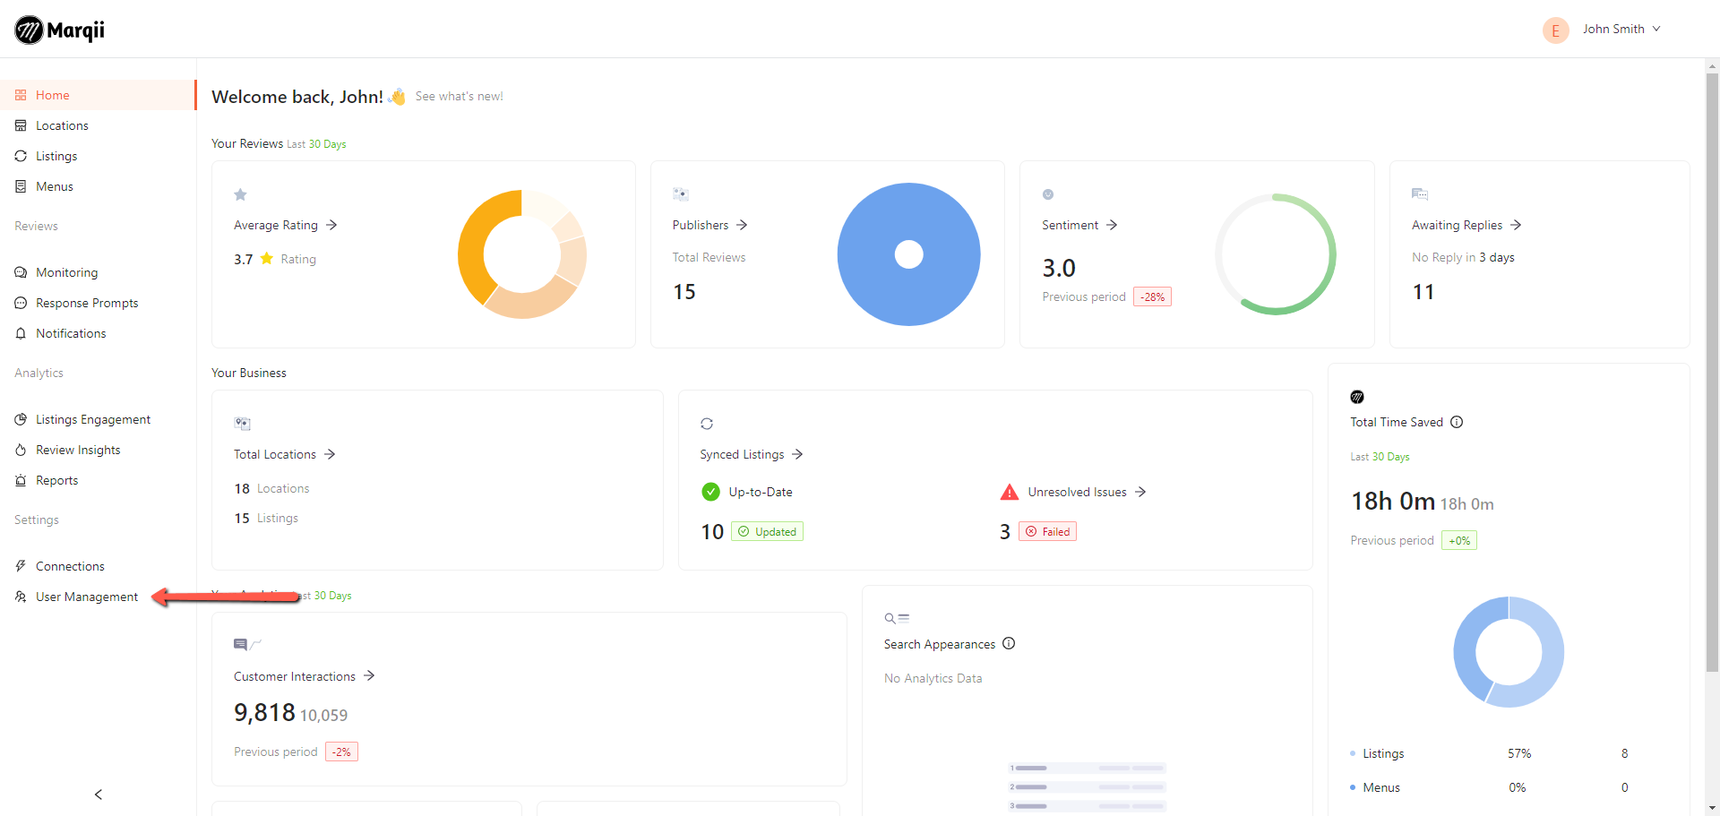
In the the User Management page, click on Create User

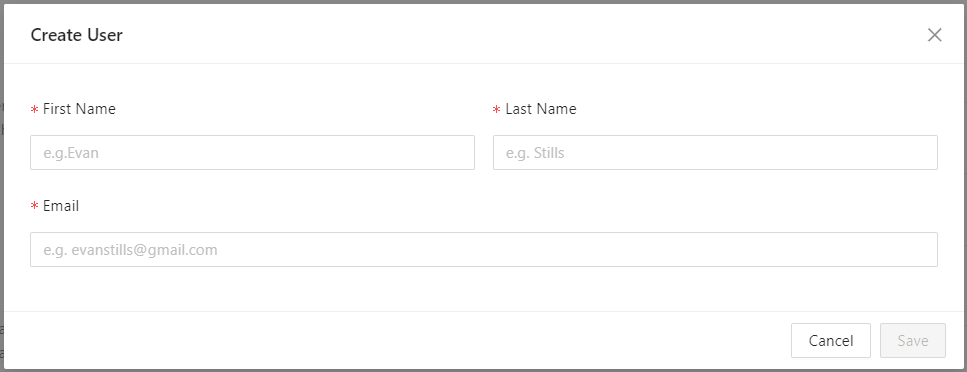
You'll receive a "Create User" pop up with a First Name, Last Name, and Email field. Fill out all 3 fields and click "Save". Clicking "Cancel" will close the pop up and cancel the use creation process.
Note: All 3 fields are required, and the Email fields must have a valid email address format.
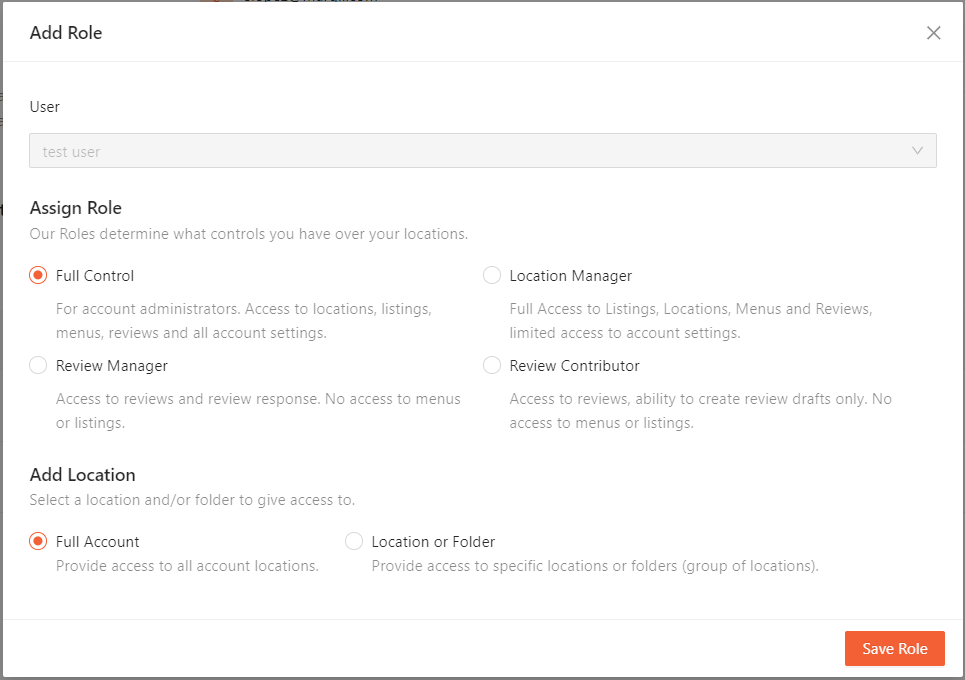
Once you click "Save", you'll see an "Add Role" pop up. From here you can set the role of your newly created user, as well as which folders and/or locations they will have access to. By default, users are assigned to the Full Control role for the Full Account. Once the role settings are set, click "Save Role", and your user will be created.
Note: Roles for users can always be edited and multiple roles can be assigned to a single user.
Once the user has been created and the role assigned to them, they will receive an email that will allow them to create their Marqii password and log into the Marqii dashboard.
Note: On the User & Roles list, the status of your added user will display "Pending Confirmation" until they go through the process of setting up their Marqii password and logging into the dashboard. Once they have done this, their status will change to "Active".

Roles
Setting roles for your users will allow you to dictate what areas and actions of the dashboard they will have access to. Roles will also allow you to set which locations users will have access to.
The available roles are:
Full Control - For account administrators. Access to locations, listings, menus, reviews and all account settings.
Location Manager - Full Access to Listings, Locations, Menus and Reviews, limited access to account settings.
Review Manager - Access to reviews and review response. No access to menus or listings.
Review Contributor - Access to reviews, ability to create review drafts only. No access to menus or listings.
Editing Existing Roles
You can edit any assigned role by clicking on the ellipses (...) next to the role you wish to edit, and selecting "Edit Role".

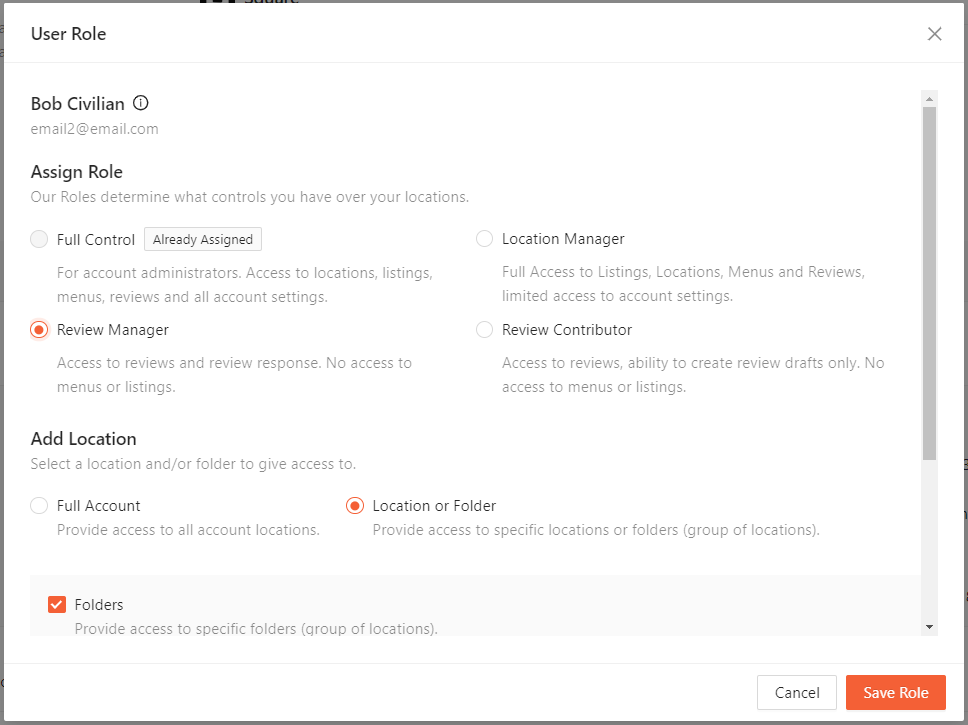
This will trigger the "User Role" pop up, where you will be able to make changes to the role.
Adding Roles to Users
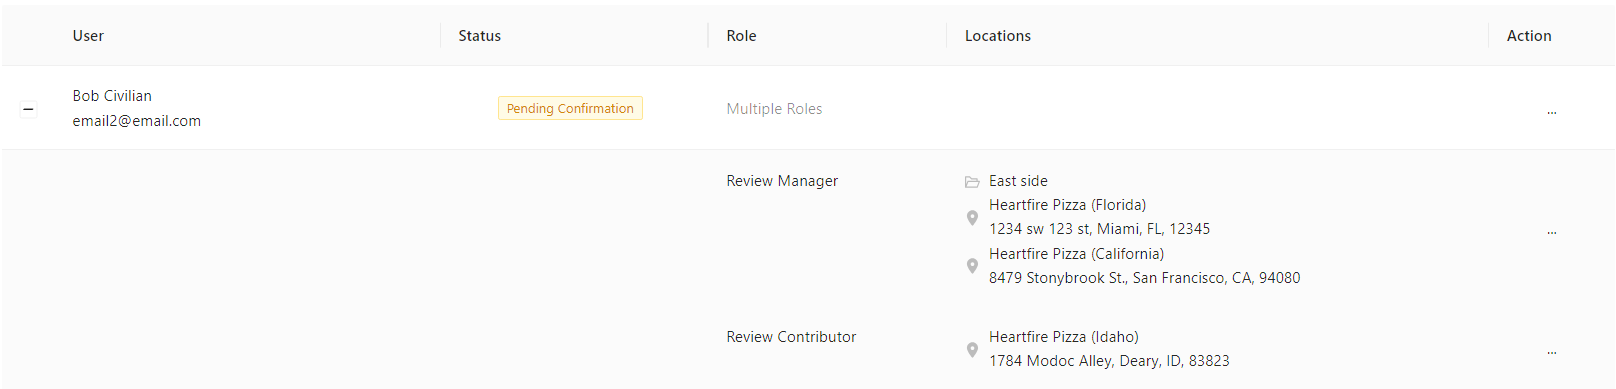
Users can have multiple roles for different locations, for example: in the screenshot below we can see that Bob is a Review Manager for the East side folder and the Florida and California locations, while also being a Review Contributor for the Idaho location.
To add roles to your users:
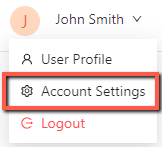
Click on your user name on the top right corner of your dashboard
In the dropdown click on Account Settings
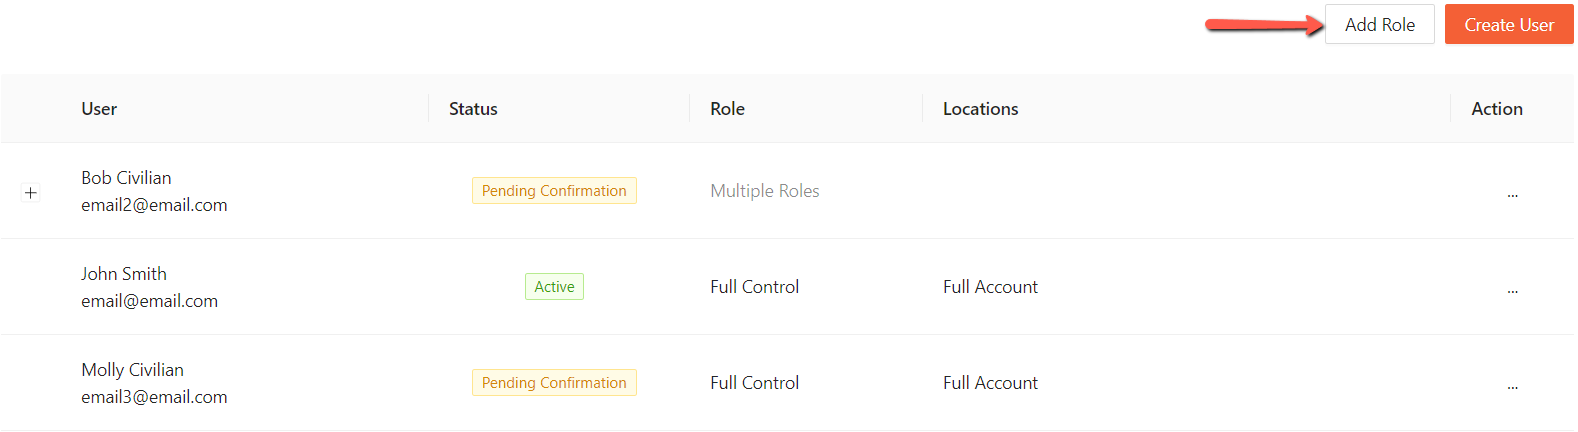
In the "Users & Roles" section, click on "Add Role" and you'll see an "Add Role" pop up

Select the user you want to add a role to from the "Select User" drop down
Once you select your user, you'll be able to select which role you would like to assign to them.
Note: Roles that are already assigned to the user will say "Already assigned" and will not be selectable. You can edit these roles from the user list.
Once you have selected the role, you can select "Full Account" in order to give the user this role for all locations and folders, or you can specify which location(s) or folder(s) you'd like the user to have access to.
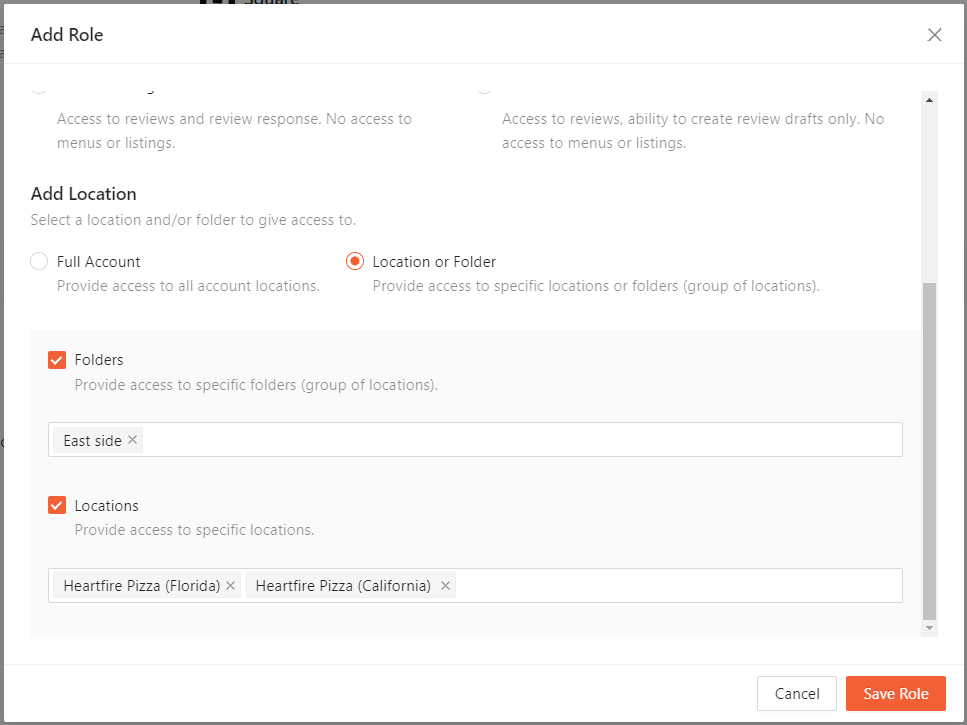
Once you have made your selection, click "Save Role" to save your user's new role, or "Cancel" to cancel the process.
Removing Existing Roles
If a user has multiple roles assigned to them, you can remove roles from them.
You can remove an assigned role by clicking on the ellipses (...) next to the role you wish to remove, and selecting "Remove Role".
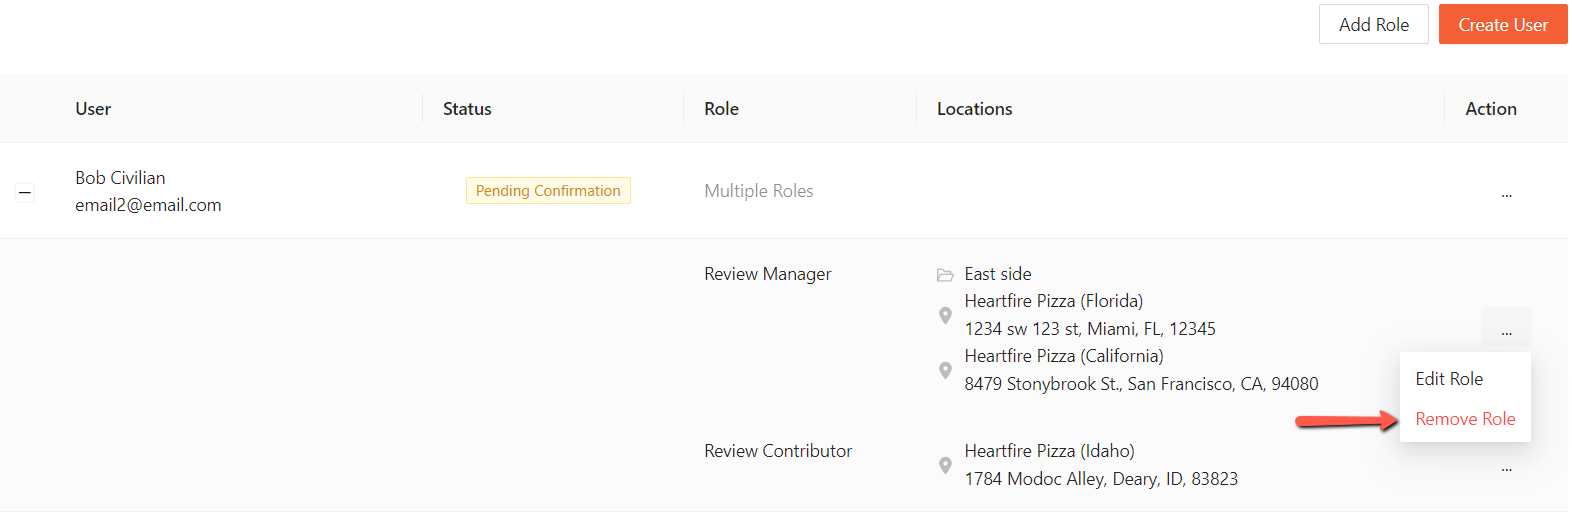
Clicking "Remove Role" will give you a confirmation pop up. Clicking "Continue" will remove the role from the user, and clicking "Cancel" will cancel the removal process.
Note: All users must have at lease one role assigned to them. Users that have only one role, will have the "Remove Role" button disabled.
Resending Confirmation Emails
When a user is added in your dashboard, they will receive an email that will allow them to set up their Marqii password and log into the account. Until they go through this process their status will show "Pending Confirmation".
In the event that the user needs the confirmation email sent to them, you are able to resend the confirmation email to them.
To do this, click on the ellipses (...) next to the user you wish to the user you wish to resend the confirmation to and then click on "Resend Confirmation".
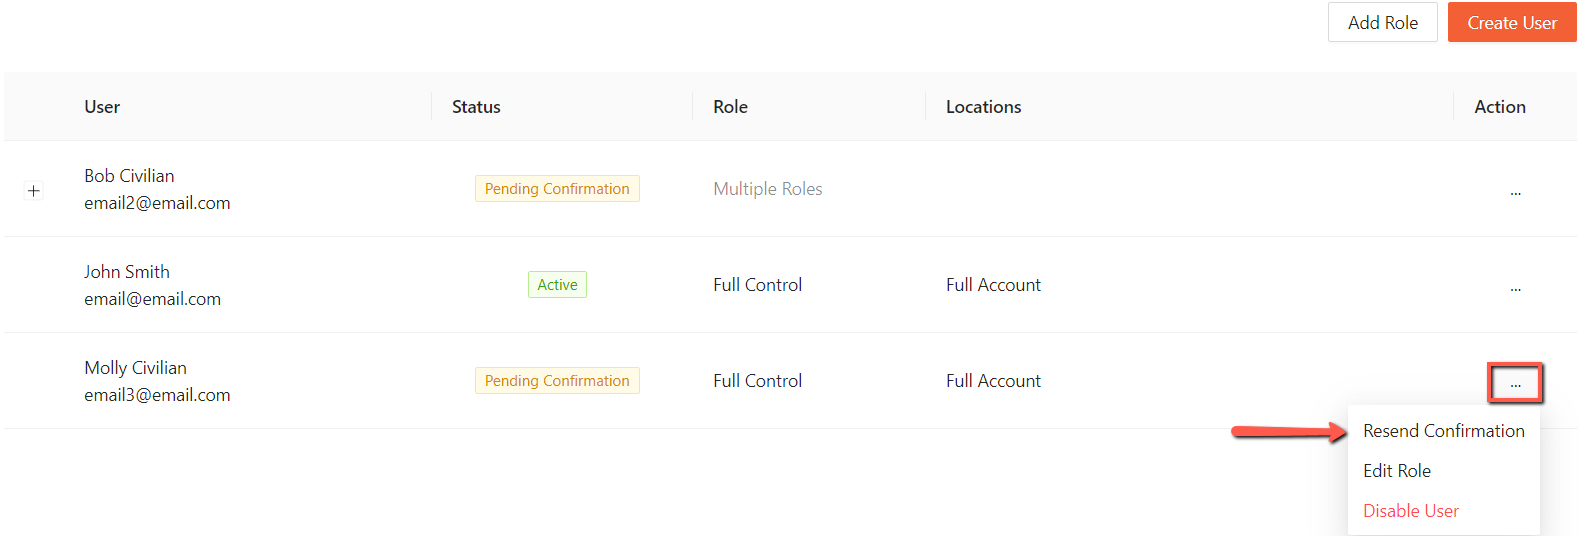
You'll then see a Resend Email pop up, click "Continue" to resend the confirmation or "Cancel" to cancel the process.
Disabling Users
You can disable users in your dashboard. This will prevent them from having access into the Marqii account.
To do this, click on the ellipses (...) next to the user you wish to disable and click "Disable User".
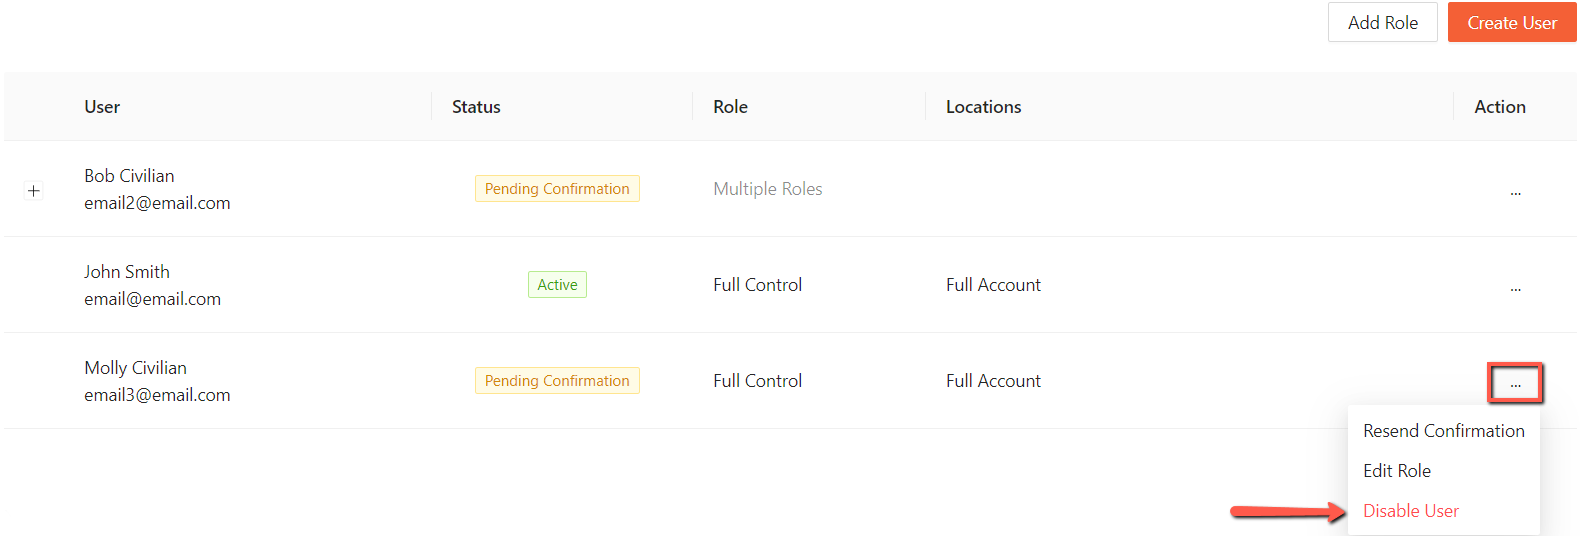
Note: Disabled users will not show on the User & Roles list. If you would like to re-enable a disabled user, please reach out to our support team.
If you need any further assistance, feel free to contact support at support@marqii.com or text (512) 967-3739.