How to Submit an Upgrade or Expansion
This guide covers how to submit an upgrade or expansion, whether it’s a change to a higher-tier package or an addition to the number of locations on an account.
Step 1: Use the Downgrade/Upgrade Calculator
Before submitting anything in Salesforce, go to the Downgrade/Upgrade Calculator to determine the updated ARR and pricing for the change.
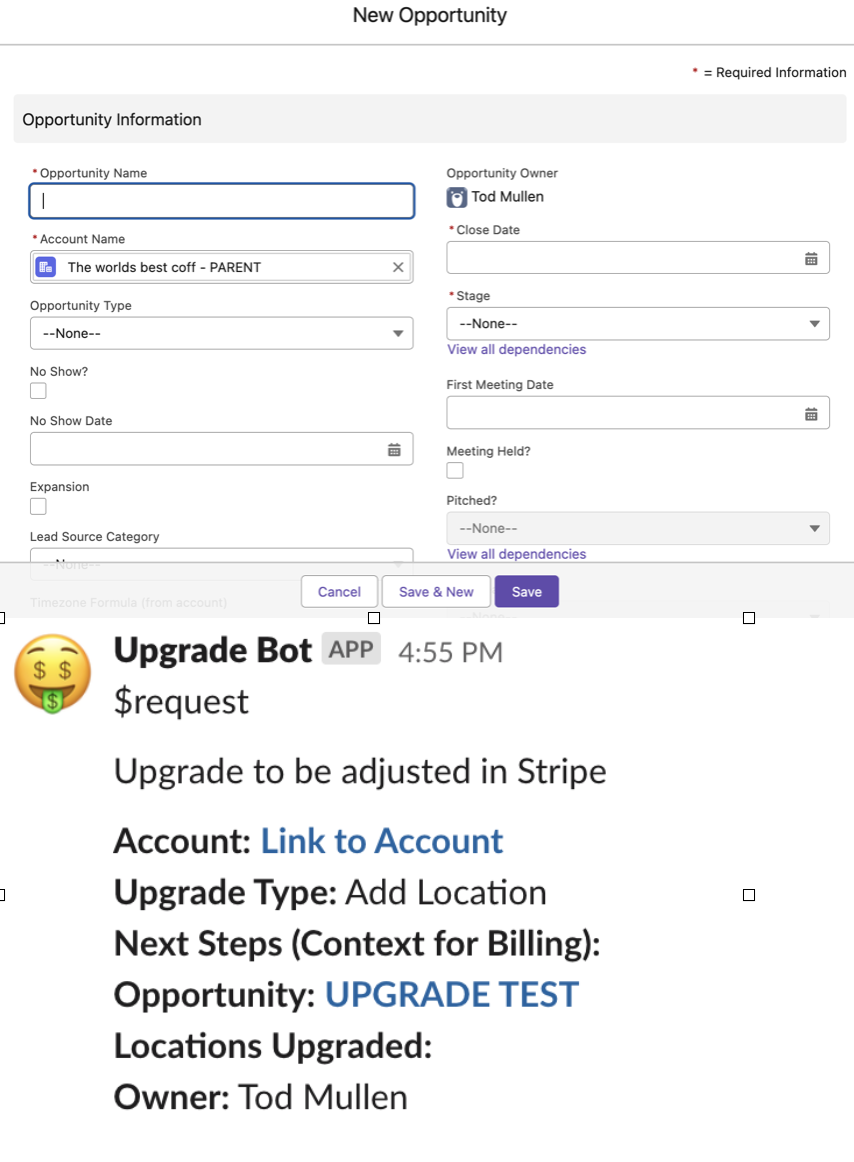
Step 2: Create the Opportunity in Salesforce
- Go to the parent account in Salesforce.
- Scroll to the Opportunities section and click Add New.
- Fill out the following fields:
- Opportunity Name: Use the format Location Name – Upgrade Type or Expansion (e.g., “Downtown – Base to KS” or “Chicago – Add Loc”).
- Opportunity Type: Select the applicable type (Add location, upgrade package, etc.)
- Lead Source Category / Lead Source / Deal Source / Deal Source Category: Copy these from the original opportunity in the account
- Price: Enter the adjusted ARR from the calculator
- Package: Select applicable package
- Locations: Enter the number of locations included in this change
- Discount Percentage: Enter the applicable discount
- Billing Terms: Select Monthly, Annual, or other applicable cadence
- Payment Method: Choose Credit, ACH, or another applicable method
- Close Date: Select the expected date the change will take effect
- Stage: Set to Verbal Commit (You’ll change this to Pending Approval after adding products)
Step 3: Add Billing Context
Use the Next Steps (Context for Billing) field to include everything billing needs to process the change. This should include:
- A brief summary of the change
- Any specific instructions for the billing team
- The Stripe URL
- Any other relevant details
Note: You no longer need to share upgrade/expansion details in the #billing-requests Slack channel. Make sure all relevant info is included here to avoid a need for a follow up conversation to happen in Slack.
Step 4: Add Products to the Opportunity
After saving the opportunity, you’ll add the associated products. For each product, complete the following fields:
- Quantity: number of locations the product applies
- Discount: Only enter a discount for added locations and skip this field for upgrades
- Sales Price: For add locations you will not need to change this; the discount field will calculate the ARR based on the sales price and the discount you added. For upgrades, change this field to be what the 'Sales Price Per Location' field calculates on the upgrade/downgrade calculator.
- Click Save
Step 5: Submit for Approval
Move the opportunity stage to Pending approval
Step 6: Automatic Slack Notification
Once you move the opportunity to pending approval, the Upgrade Bot will automatically post the details in the #billing-requests Slack channel and the team will make adjustments in Stripe. There is no need to put another message in Slack.