How to Submit a Downgrade
This guide covers how to submit a downgrade, whether it’s a change to a lower-tier package or a reduction in the number of locations on an account.
Step 1: Use the Downgrade/Upgrade Calculator
Before submitting anything in Salesforce, go to the Downgrade/Upgrade Calculator to determine the updated ARR and pricing based on the downgrade.
Step 2: Submit the Downgrade in Salesforce
- Go to the parent account in Salesforce.
- Scroll to the Downgrade section and click Add New.
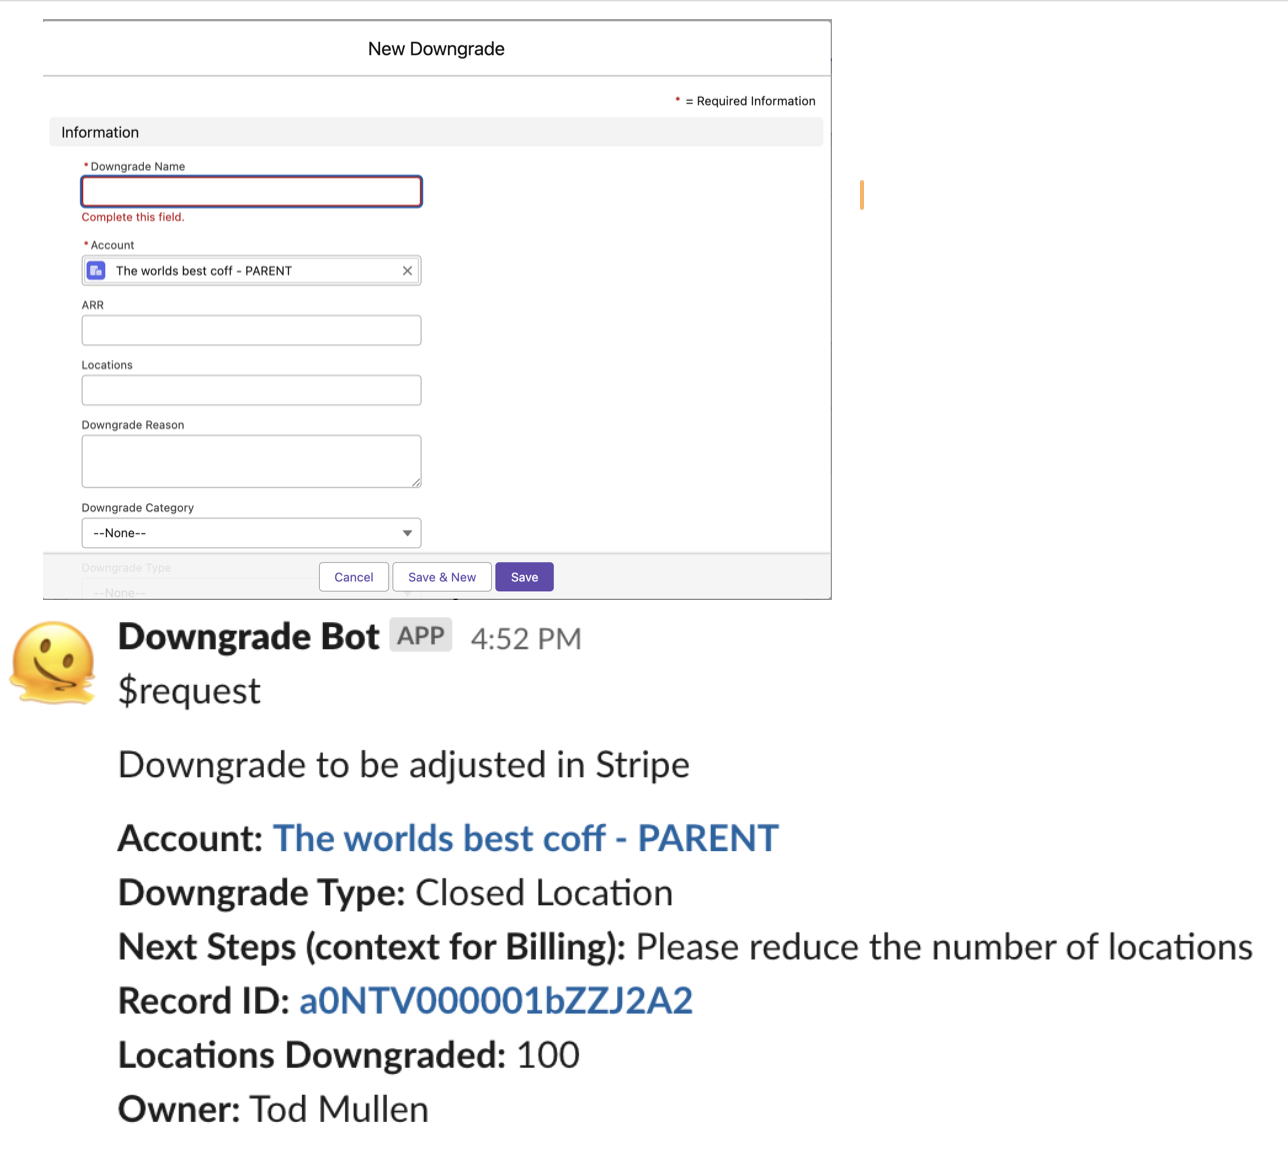
- Fill out the following fields:
- Downgrade Name: Use the format Location Name – Downgrade Type (e.g., “Downtown – KS to Base” or “Chicago – Location Closed”).
- ARR: Enter the updated value from the Downgrade Calculator.
- Locations: Enter the number of locations affected by this change.
- Downgrade Reason: Provide detailed context about why the downgrade is occurring.
- Downgrade Category: Select the applicable category (e.g., Closed Location, Package Downgrade).
- Downgrade Type: Choose whether this is a closed location or a package change.
- Current Package / New Package: If applicable, select the current and new package options from the dropdowns.
Step 3: Add Billing Context
Use the Next Steps (Context for Billing) field to include everything billing needs to process the change. This should include:
- A brief summary of the change
- Any specific instructions for the billing team
- The Stripe URL
- Any other relevant details
Note: You no longer need to share downgrade details in the #billing-requests Slack channel. Make sure all relevant info is included here to avoid a need for a follow up conversation to happen in Slack.
Step 4: Automatic Slack Notification
Once submitted, the Downgrade Bot will automatically post the details in the #billing-requests Slack channel and the team will make adjustments in Stripe. There is no need to put another message in Slack.